- Published on
Create a Simple Terraform Project in AWS
- Authors

- Name
- Michael McCarthy
Infrastructure as Code (IaC) is the new normal in cloud; I would go as far as to say it's a must have for all production use cases. Don't get me wrong, I love ClickOps, and I'm 100% guilty of clicking through the console to test out the latest and greatest AWS services. But it's hard to ignore the benefits of IaC; simplifying multi-environment deployments, avoiding configuration errors that could be introduced through manual deployments, and building on best practices through a tracked codebase. I would also add that the declarative nature of IaC makes it self-documenting. Good IaC should be simple to read and understand above anything!
I started my IaC journey with Terrafom, and it's still the tool I use in both professional and personal projects. It's very similar to AWS's CloudFormation with the key difference being that Terraform is cloud-agnostic, and you can deploy to AWS as easy as you can deploy to GCP, Azure, or any one of the thousands of Providers Terraform supports! Terraform was previously open source, however, in 2023 HashiCorp decided to close source Terraform, and those looking for an open source alternative should checkout OpenTofu. But still, if you're just getting started with IaC I'd strongly recommend Terraform due to it's ease of use, multi-purpose nature, and general ubiquity in the industry.
If you're still reading this and interested in getting your feet wet with Terraform, this article is the perfect place to start! We'll setup our local development environment and directly deploy a mini Terraform project (a single S3 bucket) to our AWS account!
Prerequisites
There's a few things you'll need before you get setup here:
- An AWS account with the ability to create resources in IAM and S3
- A local development environment (Mac OS, Windows, or Linux) with the ability to install and run applications
Solution Overview
This solution sets you up a local development environment suitable for Terraform development and deployment to AWS. In the first part we will create an IAM User to be when authenticating AWS CLI & Terraform to our AWS account through access keys. Next we will install AWS CLI and configure it with our newly created access keys. We'll install Terraform and create a simple Terraform project. Finally, we'll bring everything together when we demo applying and destroying the Terraform project in AWS.
Step 1: Create AWS Access Keys
For this setup we'll create and authenticate as an IAM User, however technically AWS IAM best practice says that users should authenticate with temporary credentials provided by identity provider federation. I'll touch on this in a future article!
In short, we need an IAM User to be created within an IAM Group containing a IAM Policy that authorizes us to perform our deployment with least-privilege permissions.
This is actually easier to demo in reverse, so I'll be creating the policy first. In the AWS console, go to IAM > Policies > Create policy, and I'll create a simple policy to authorize our use case-specific permissions,in this example S3 permissions, but you need to make sure that the policy you create here allows you to both read and write to resources you want Terraform to manage.
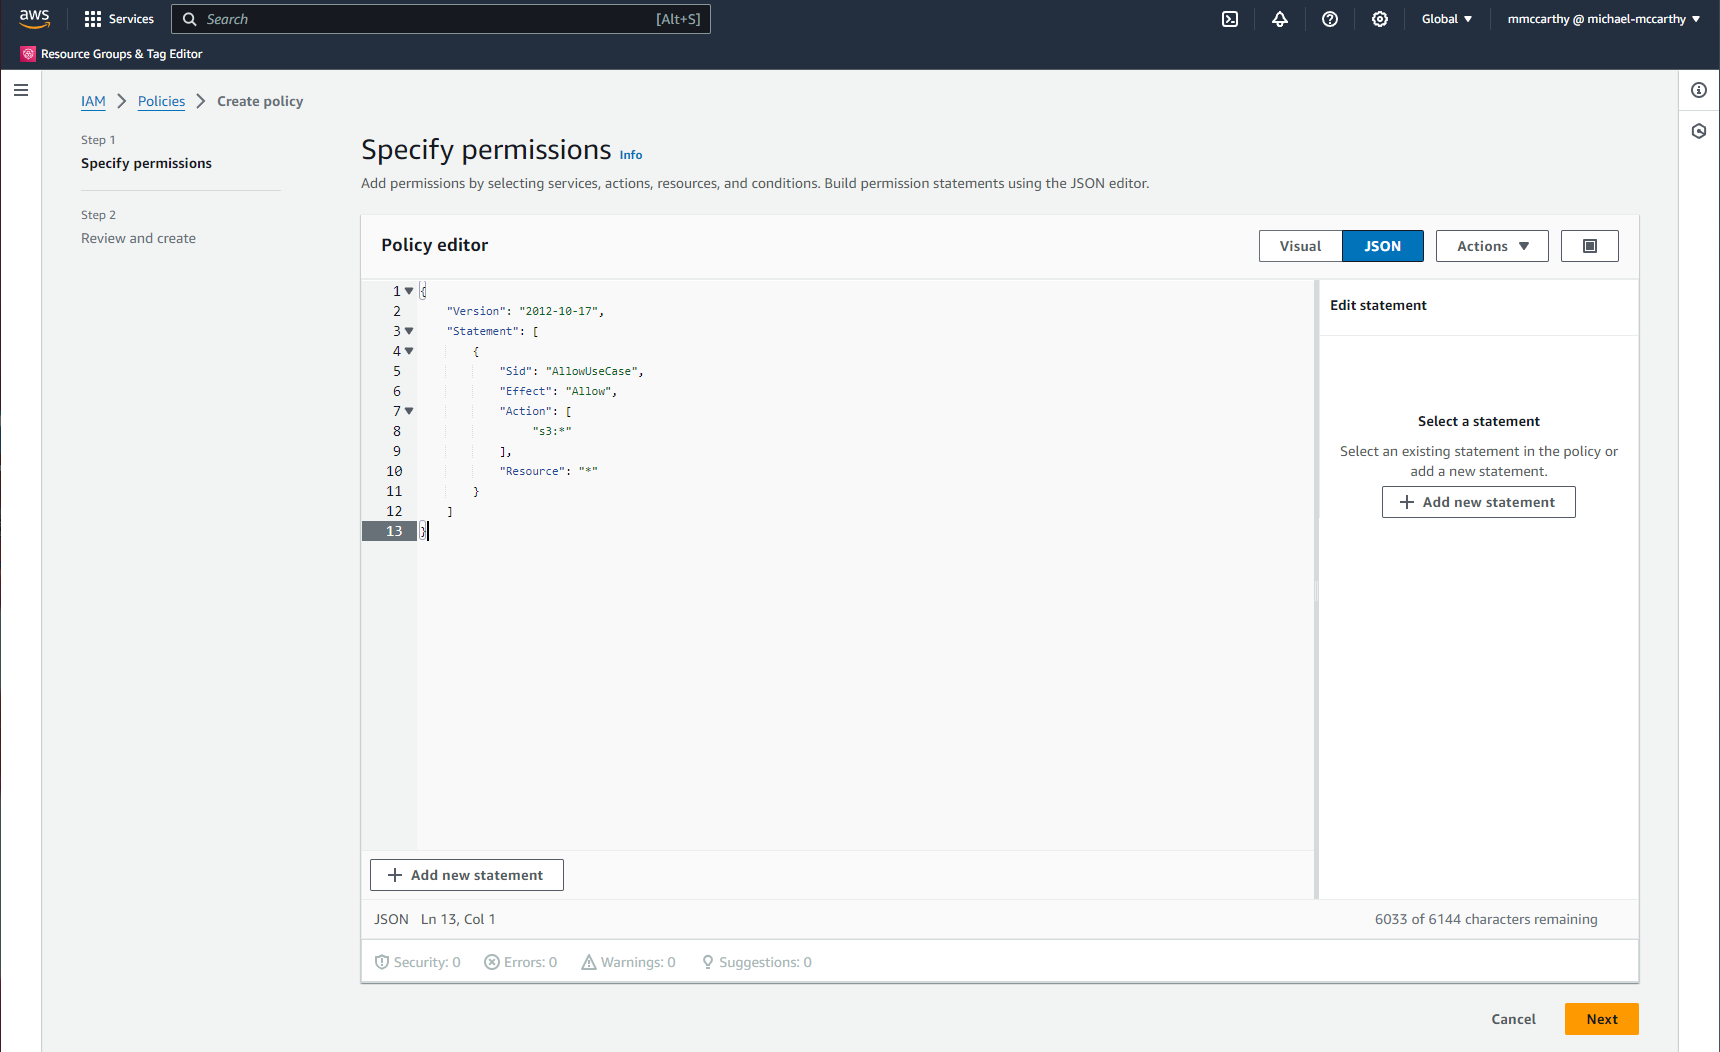
Select JSON in the policy editor, and paste this directly in the editor:
{
	"Version": "2012-10-17",
	"Statement": [
		{
			"Sid": "AllowUseCase",
			"Effect": "Allow",
			"Action": [
			     "s3:*"
			],
			"Resource": "*"
		}
	]
}
I would definitely encourage you to read more into what each part of this JSON policy means on your own time, but in general policy statements like this power authorization across AWS. Here the important, required, elements to note are Effect which can have a value of Allow or Deny and says whether the statement is allowed or denied, Actions which is the specific AWS resource API request to allow or deny. And Resource which is the AWS object(s) that the statement is applied to. Technically, it's best to scope permissions to just the resources needed, for example I could scope a statement to a specific S3 bucket like "Resource": "arn:aws:s3:::mybucket", but for now we're just using a wildcard to scope everything ("Resource": "*").
You should see something similar to the below. If so click Next.
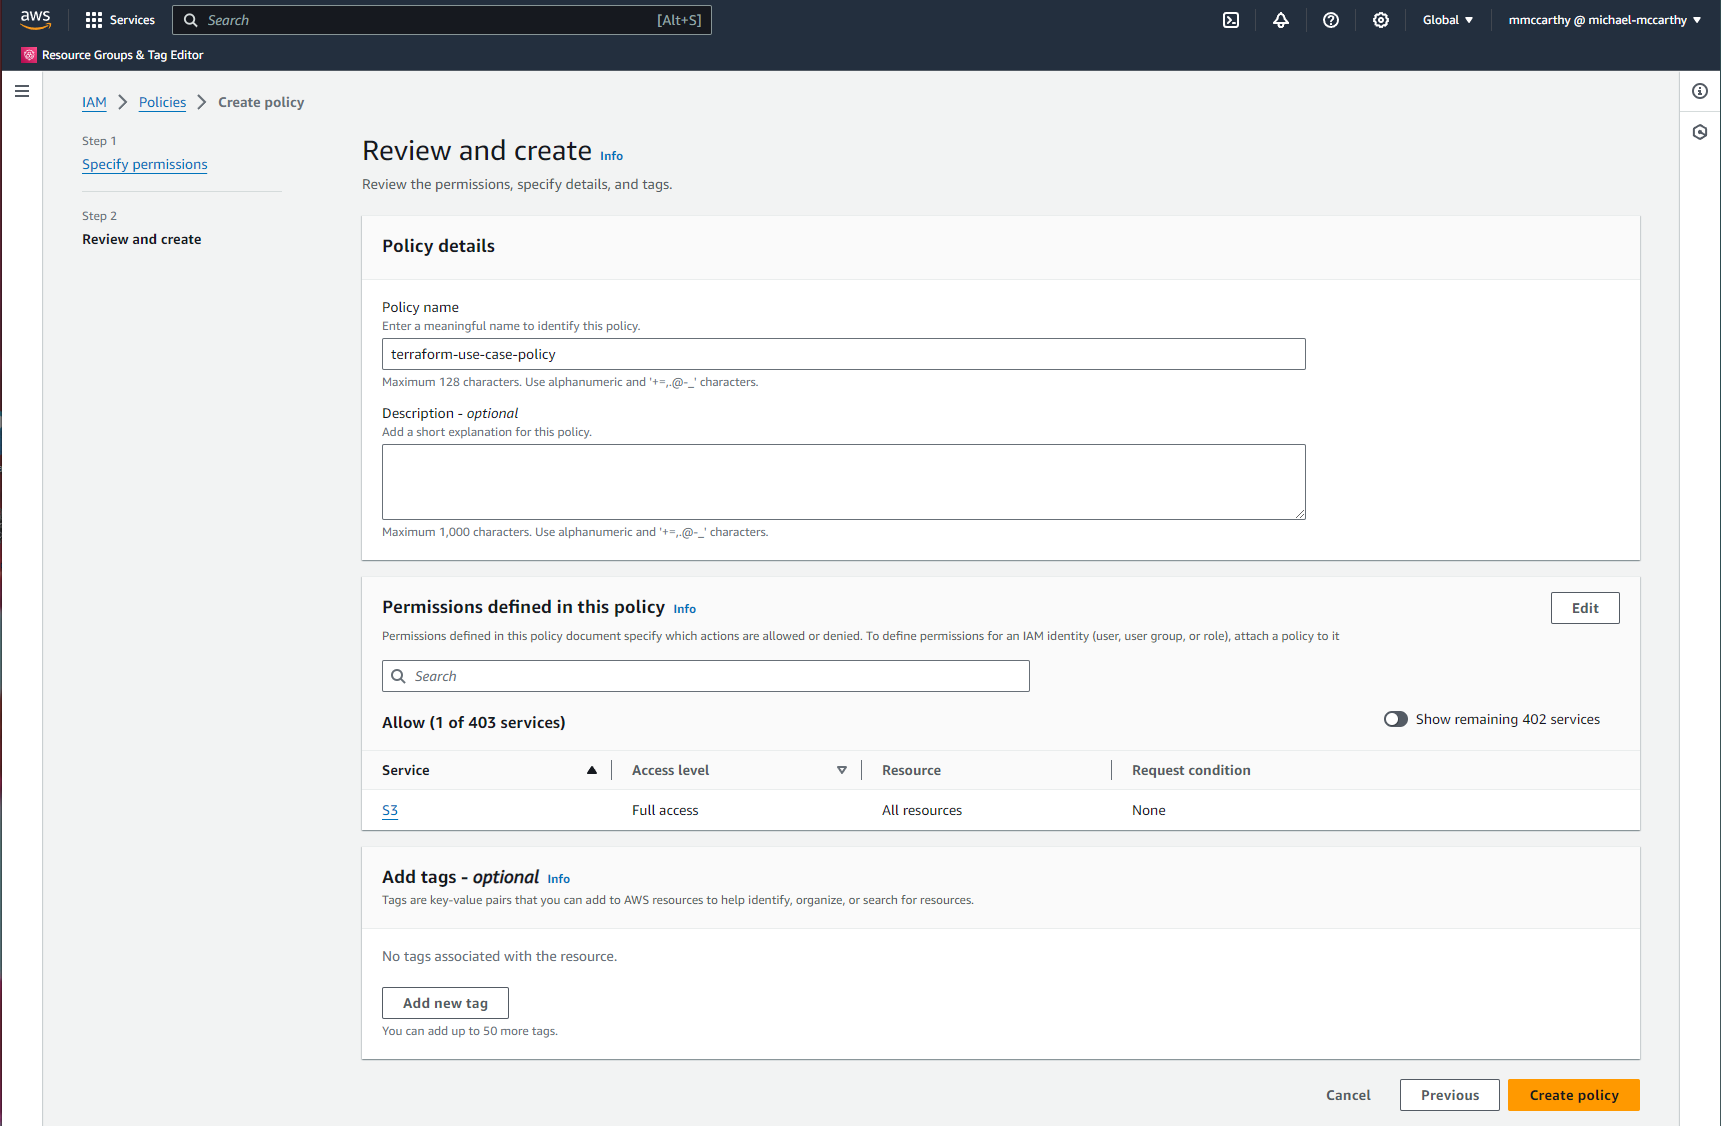
Give a Policy name (I'll use terraform-use-case-policy), an optional Description, and create the policy by clicking Create Policy!
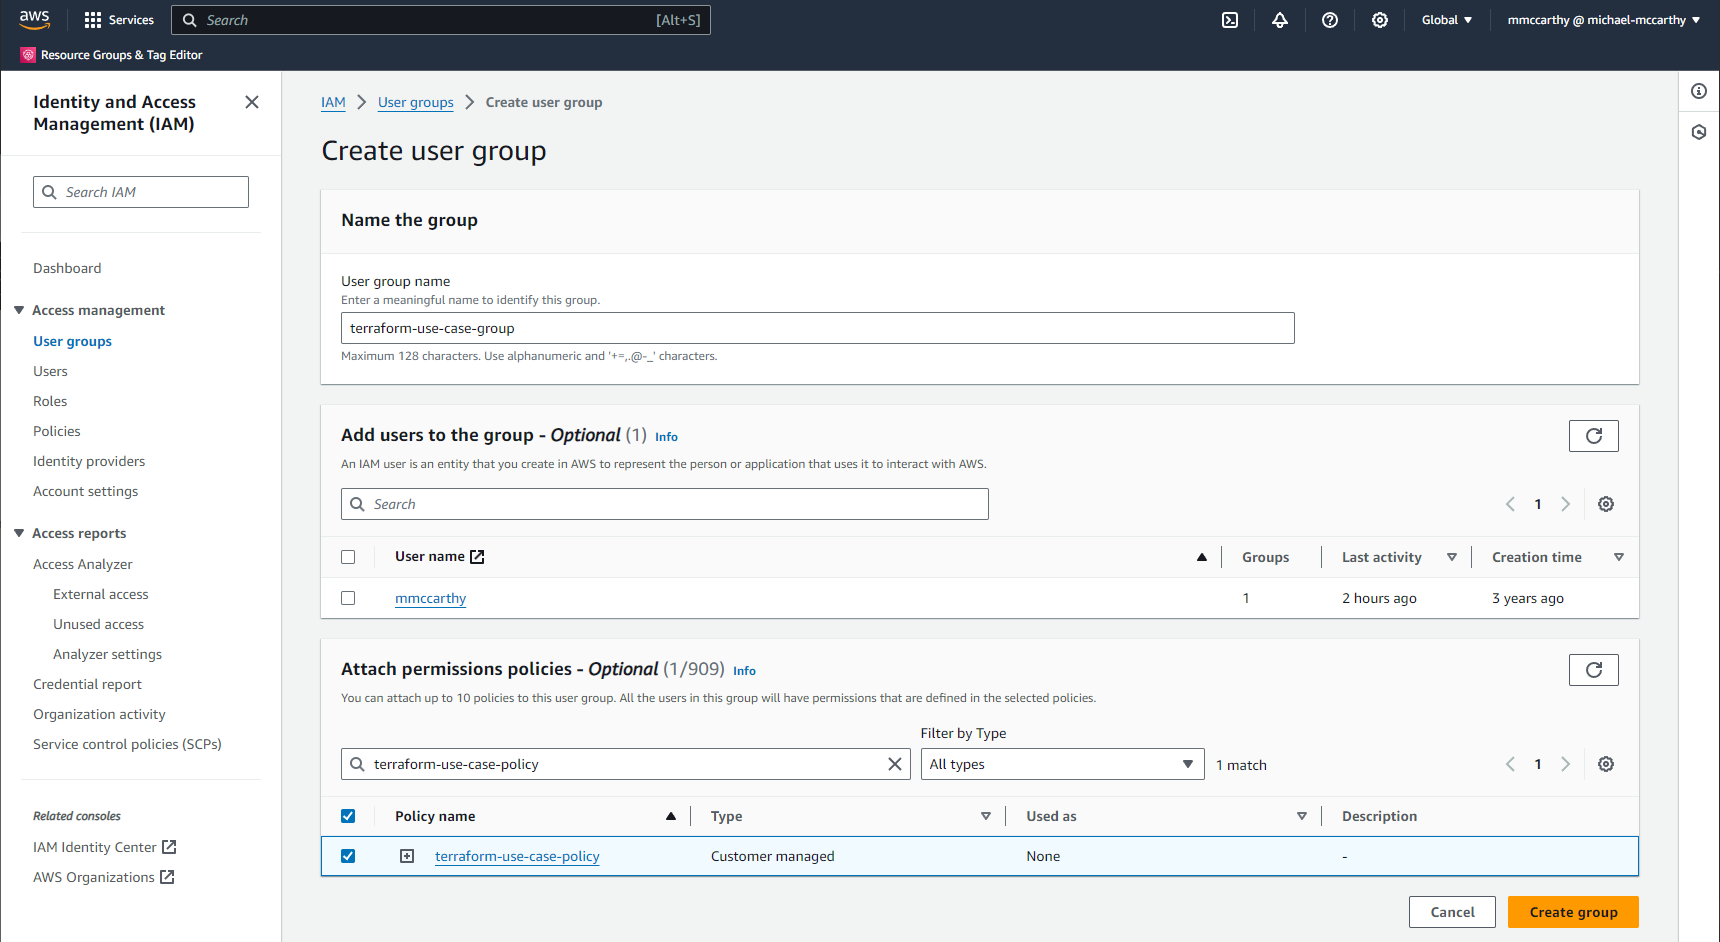
Now let's create an IAM User group and add our policy to the group. Groups allow you to share some defined set of policies across multiple users with similar use cases and access requirements. So in the future if you hypothetically had multiple users for Terraform use cases, you could reuse this group across all! To start, simply go to IAM > User groups > Create group and enter some descriptive name for User group name (I'll go with terraform-use-case-group). Skip the optional Add users to the group section for now, and go directly to the Attach permissions policies; here, search for whatever policy you created previously and check the box to it's left to attach the policy to the group. When you're all done click Create group!
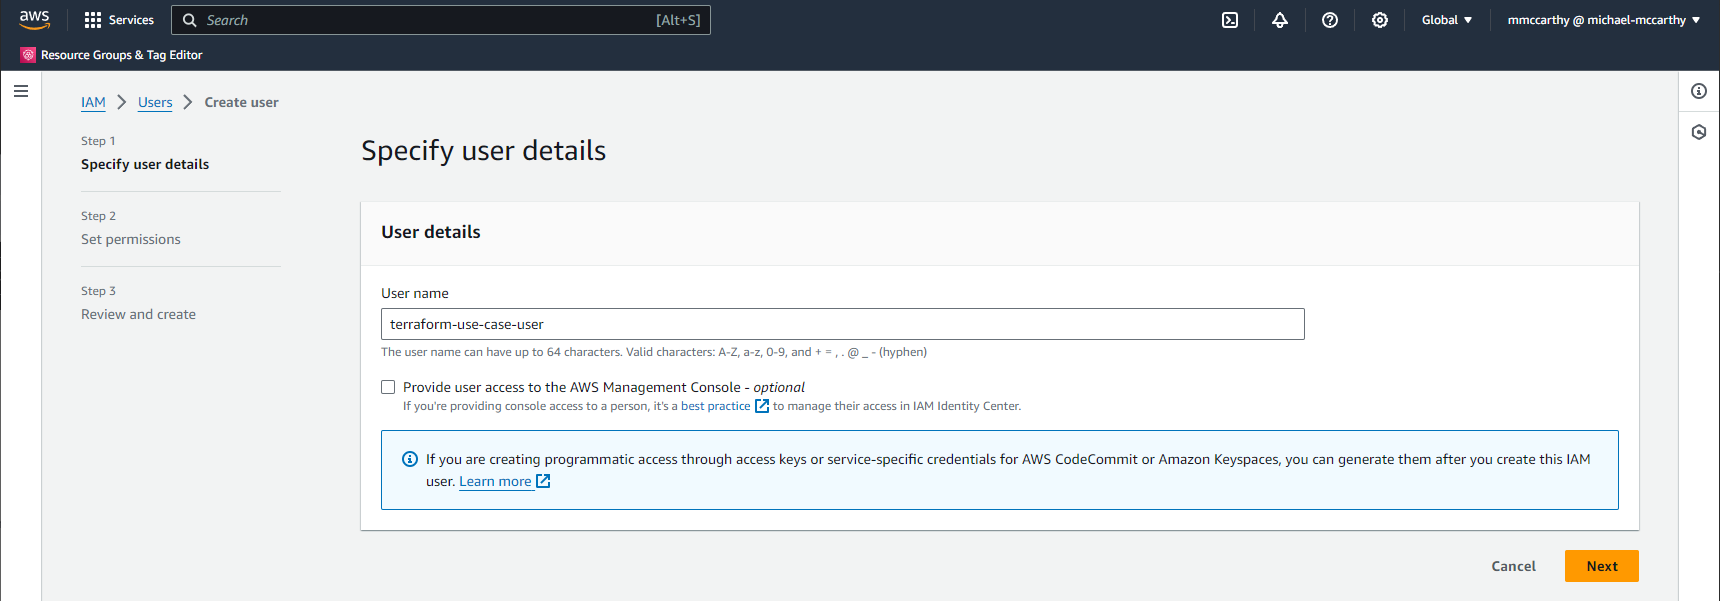
Now we'll create out user and assign it to our group. Navigate to IAM > Users > Create user, enter some descriptive value for User name, I'm using terraform-use-case-user, and leave everything else as default. Click Next.
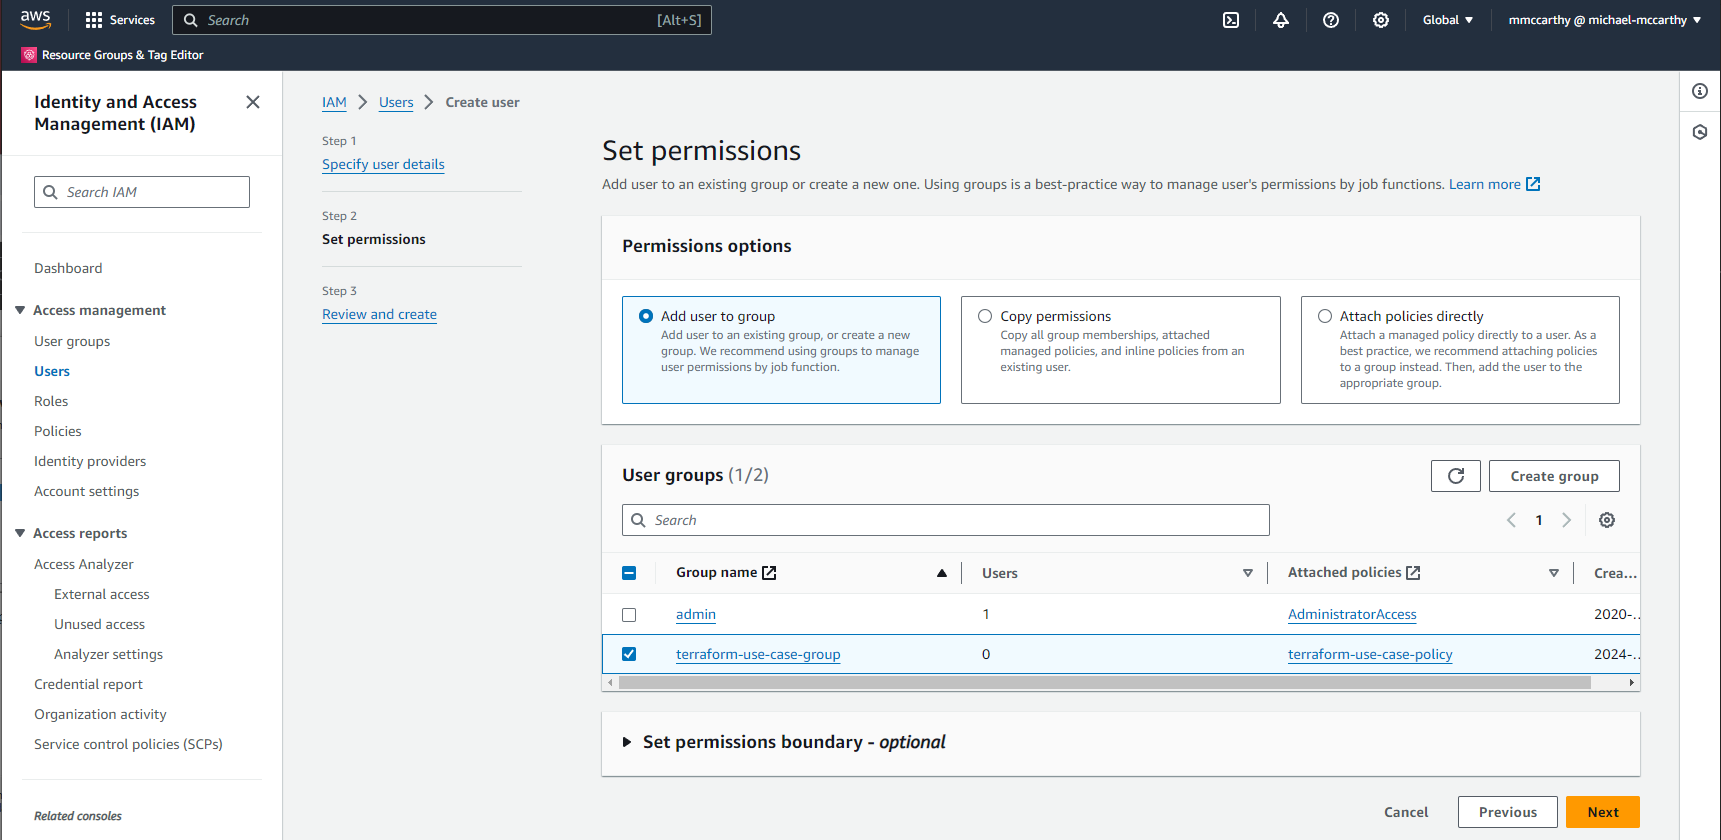
On the next page select the previously created group in the User groups section. Click Next and then Create user on the final screen to confirm and you're done!
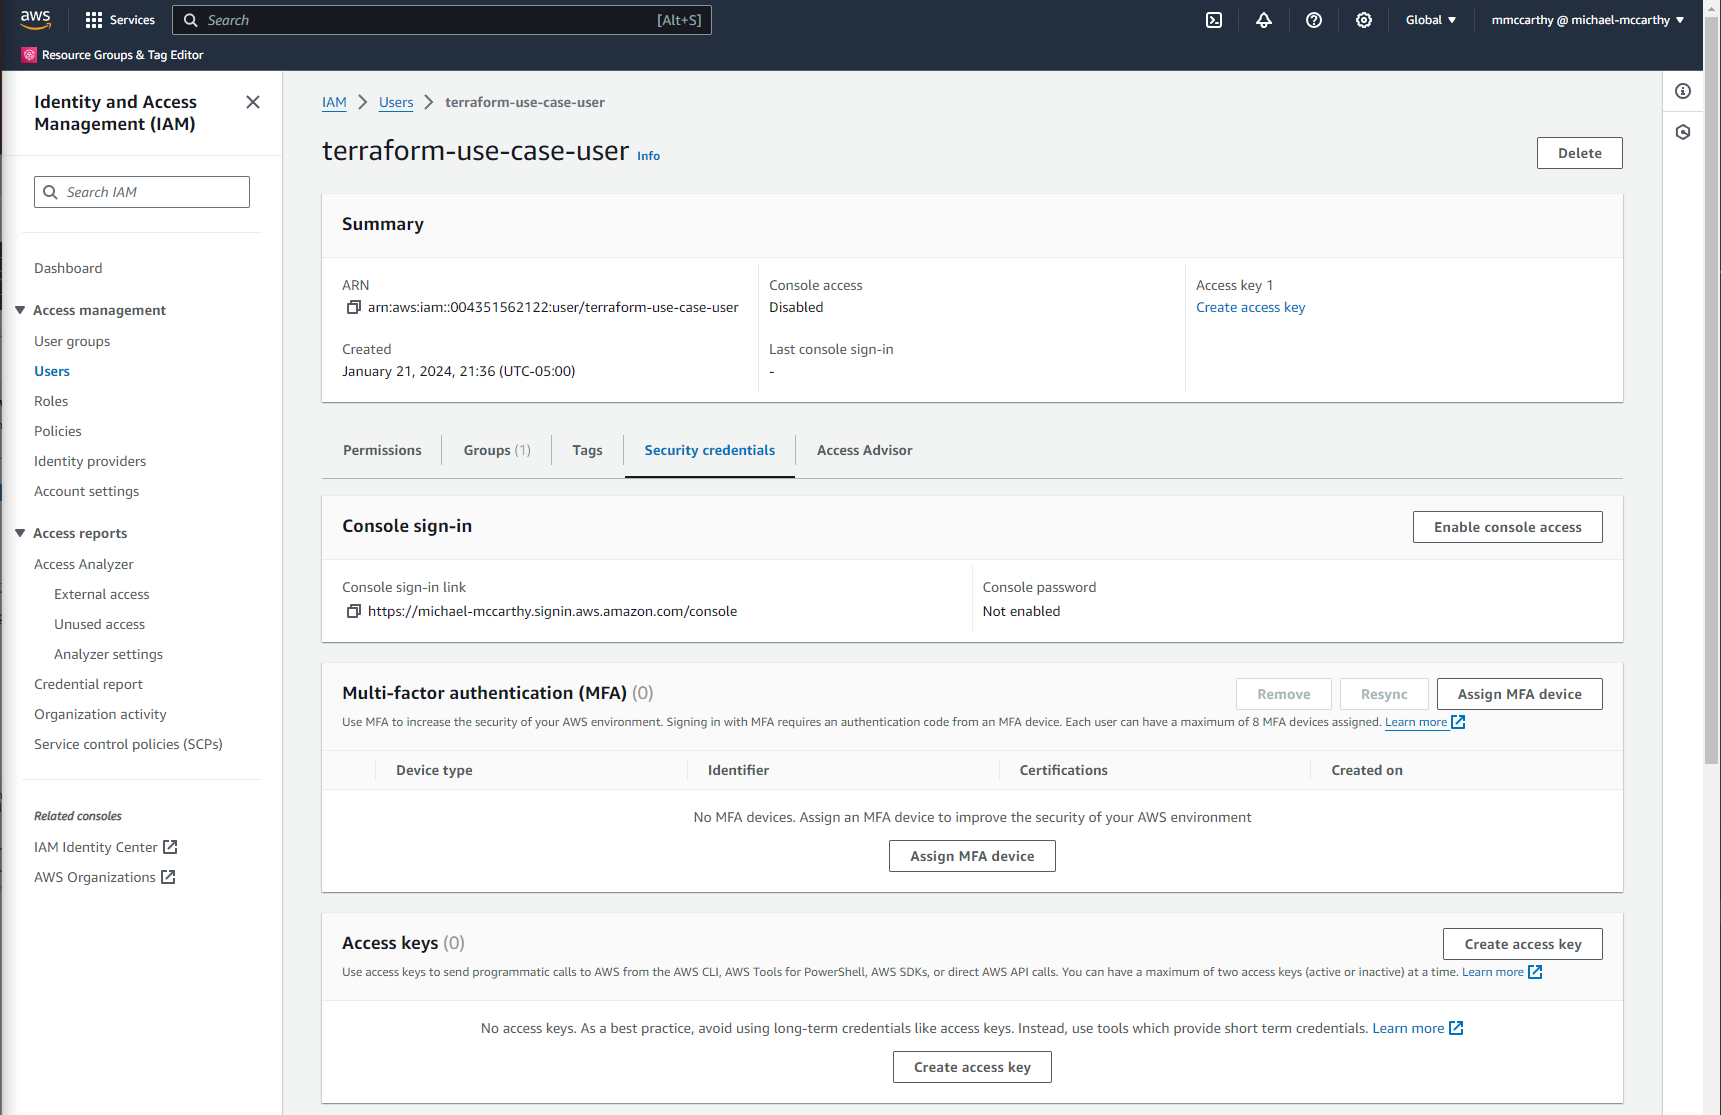
Finally, we can get the actual Access keys for the new user we just created. For the last time, go to IAM > Users and click the user you just created. From the user page go to the Security credentials tab and click Create access key.
On the next page select Local code and confirm that you acknowledge that there are alternative ways to authenticate your local code (but this is out of scope for this project). Click Next and Create access key on the final page to create your access keys.

Store your Access key and Secret access key in a secure and private place, this is the only time you'll be able to see these.
Protect these keys like you would protect your AWS password; anyone who gets access to these keys shares the same permissions as the underlying user, and it only takes accidentally leaking one set of overprovisioned keys to compromise your entire AWS account! The keys I'm showing here have already been deleted, and I've only included them for demonstration.Step 2: Install AWS CLI
Now that we've created the user we'll authenticate with, we can install AWS CLI, a very powerful command line utility that let's you access everything the AWS console has to offer and more, as you dive deeper into AWS, you'll see that there are some AWS operations only accessible in the AWS CLI. Also, fun fact, AWS CLI is actually powered by the Python AWS library boto3 under the hood! The reason why we're using AWS CLI in this project is actually because Terraform uses the AWS CLI to authenticate to AWS; we won't be using AWS CLI standalone for anything in this project. I'm just going off of the official AWS CLI install documentation for Linux, but the documentation has info on other OS installs as well if you want to follow along.
This is a simple install, simply download the zip file.
curl "https://awscli.amazonaws.com/awscli-exe-linux-x86_64.zip" -o "awscliv2.zip"
Unzip it.
unzip awscliv2.zip
And install it!
sudo ./aws/install
Step 3: Configure AWS CLI
Installation alone isn't enough, now we need to configure AWS CLI to be able to authenticate to our AWS account.
aws configure
This should prompt you for a number of input values:
AWS Access Key ID: Access key created previouslyAWS Secret Access Key: Secret access key created previouslyDefault region name: AWS Region to deploy to (I use us-east-1)Default output format: AWS CLI output format (I just leave this blank)
If you did this right, you can test out that the full authorization out by listing all S3 buckets in your account.
aws s3 ls
This command returns a list of buckets in my account, and you'll see something similar to the below with your own buckets.
2023-08-08 20:24:32 aheadinthecloud-logs-us-east-1-004351562122-prod
2023-08-08 20:24:13 aheadinthecloud-us-east-1-004351562122-prod
2023-06-17 18:53:21 tf-state-us-east-1-004351562122-prod
Step 4: Install Terraform
This is a Terraform-focused project, so we'll need Terraform. Again, I'm currently working in a Linux environment, so I'll be sharing Linux-specific code snippets, but I'm just going off of the official Terraform documentation, so feel free to follow along!
To start with we'll need to update our local package index and install gnupg &software-properties-common.
sudo apt-get update && sudo apt-get install -y gnupg software-properties-common
Next install HashiCorp's GPG key.
wget -O- https://apt.releases.hashicorp.com/gpg | \
gpg --dearmor | \
sudo tee /usr/share/keyrings/hashicorp-archive-keyring.gpg
And add the HashiCorp Repo to your system.
echo "deb [signed-by=/usr/share/keyrings/hashicorp-archive-keyring.gpg] \
https://apt.releases.hashicorp.com $(lsb_release -cs) main" | \
sudo tee /etc/apt/sources.list.d/hashicorp.list
Now we can just update our package index once more to include the HashiCorp repo.
sudo apt update
And install Terraform!
sudo apt-get install terraform
I verify installation on my own system by checking the version.
terraform -v
Step 5: Create Terraform Project
Finally we can create our Terraform project! Because some extra files will be created as part of the initialization, I would suggest you create these in a project-specific directory just to isolate the project's scope. Terraform also doesn't have any explicit import concept, and instead, all .tf files in the working directory are merged and deployed together on deployment, so another reason for directories.
Create the project-specific directory and go into it.
mkdir terraform-use-case && cd terraform-use-case
Create a new Terraform file main.tf
terraform {
  required_providers {
    aws = {
      version = ">= 5.33.0"
      source = "hashicorp/aws"
    }
  }
}

resource "aws_s3_bucket" "example" {
  bucket = "terraform-use-case-bucket"
}
This is all we need! Terraform is written declaratively in HashiCorp Configuration Language (HCL), which looks very similar to JSON. We include a terraform block where we specify the required provider aws with version constraints. We also create an S3 bucket with the aws_s3_bucket block.
I'd encourage you to dive deeper into Terraform outside of this article, and HashiCorp already has AWS-specific tutorials you can use for further development.
Step 6: Deploy Terraform Project
The last step is simple, first let's initialize our project. From the directory containing main.tf run the following.
terraform init
Initializing creates a new hidden directory .terraform where all provider plugins needed for a project are downloaded (here hashicorp/aws). It also creates a hidden file .terraform.lock.hcl to record these provider selections.
We can optionally see what a hypothetical deployment would create or destroy by running the following.
terraform plan
I see the following output, confirming that one bucket should be created.
Terraform used the selected providers to generate the following execution plan. Resource actions are indicated with the following symbols:
  + create

Terraform will perform the following actions:

  # aws_s3_bucket.example will be created
  + resource "aws_s3_bucket" "example" {
      + acceleration_status         = (known after apply)
      + acl                         = (known after apply)
      + arn                         = (known after apply)
      + bucket                      = "terraform-use-case-bucket"
      + bucket_domain_name          = (known after apply)
      + bucket_prefix               = (known after apply)
      + bucket_regional_domain_name = (known after apply)
      + force_destroy               = false
      + hosted_zone_id              = (known after apply)
      + id                          = (known after apply)
      + object_lock_enabled         = (known after apply)
      + policy                      = (known after apply)
      + region                      = (known after apply)
      + request_payer               = (known after apply)
      + tags_all                    = (known after apply)
      + website_domain              = (known after apply)
      + website_endpoint            = (known after apply)
    }

Plan: 1 to add, 0 to change, 0 to destroy.
Finally, I can deploy by running the following and confirming with yes.
terraform apply
Terraform used the selected providers to generate the following execution plan. Resource actions are indicated with the following symbols:
  + create

Terraform will perform the following actions:

  # aws_s3_bucket.example will be created
  + resource "aws_s3_bucket" "example" {
      + acceleration_status         = (known after apply)
      + acl                         = (known after apply)
      + arn                         = (known after apply)
      + bucket                      = "terraform-use-case-bucket"
      + bucket_domain_name          = (known after apply)
      + bucket_prefix               = (known after apply)
      + bucket_regional_domain_name = (known after apply)
      + force_destroy               = false
      + hosted_zone_id              = (known after apply)
      + id                          = (known after apply)
      + object_lock_enabled         = (known after apply)
      + policy                      = (known after apply)
      + region                      = (known after apply)
      + request_payer               = (known after apply)
      + tags_all                    = (known after apply)
      + website_domain              = (known after apply)
      + website_endpoint            = (known after apply)
    }

Plan: 1 to add, 0 to change, 0 to destroy.

Do you want to perform these actions?
  Terraform will perform the actions described above.
  Only 'yes' will be accepted to approve.

  Enter a value: yes

aws_s3_bucket.example: Creating...
aws_s3_bucket.example: Creation complete after 1s [id=terraform-use-case-bucket]

Apply complete! Resources: 1 added, 0 changed, 0 destroyed.
Success! (If this failed, it's possible that you tried to create a bucket with a name that already exists due to S3's globally unique naming requirement). I can quickly confirm that the bucket exists through the console.
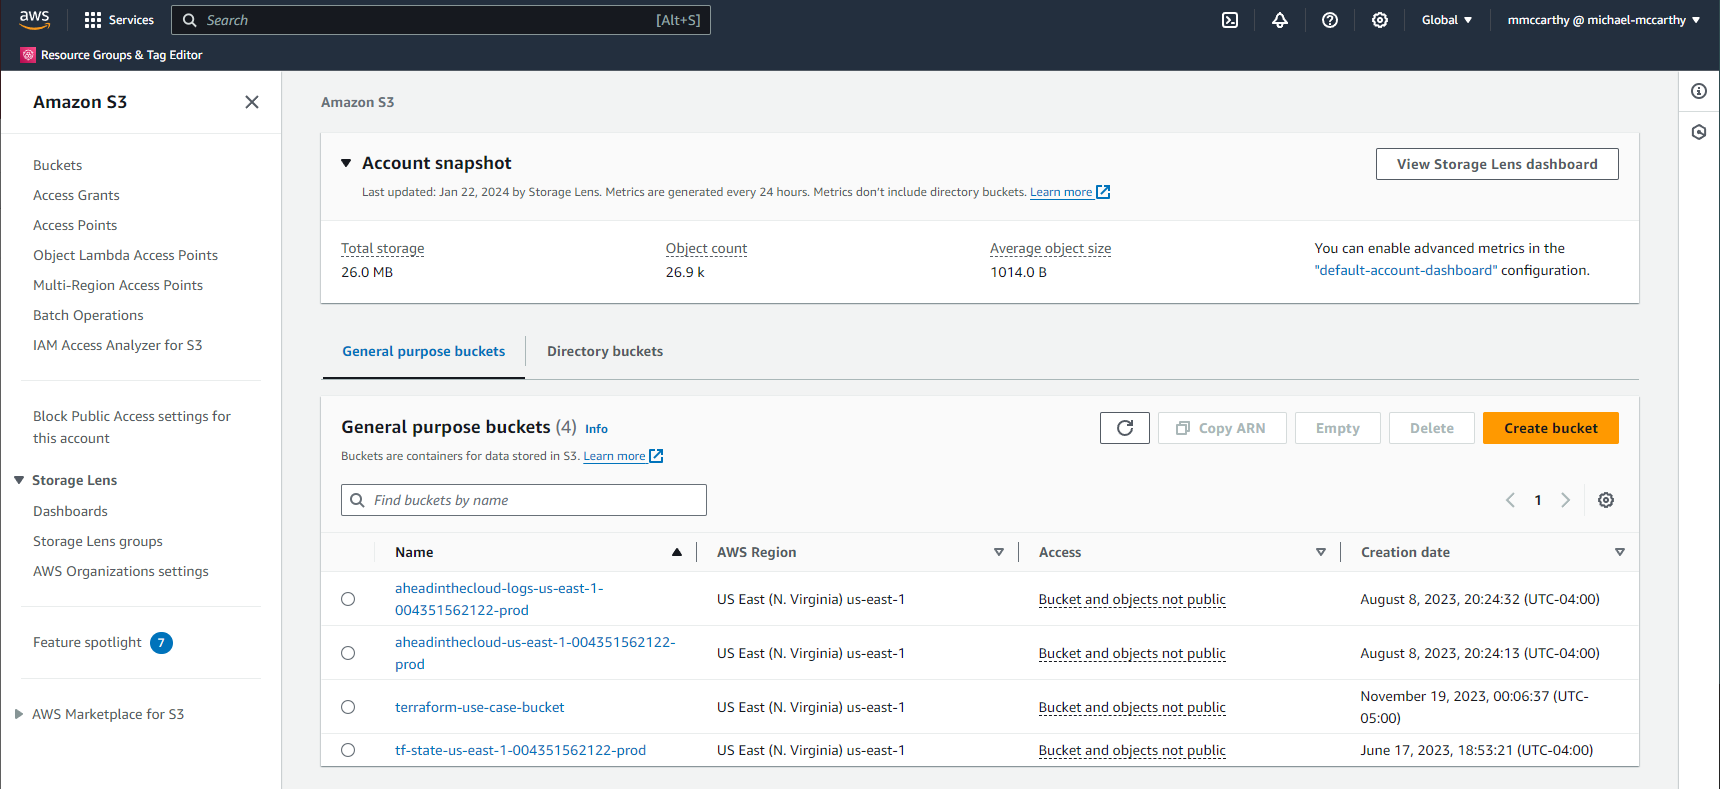
Another very important thing to note is that in your working directory, you'll see a new file, terraform.tfstate. You might sometimes see this file referred to as the state file, and this is how Terraform keeps track of what resources it manages. Looking inside you can see that it contains all of the information about the bucket it just created in addition to metadata about the deployment.
{
  "version": 4,
  "terraform_version": "1.5.0",
  "serial": 1,
  "lineage": "80ac83b3-0578-5978-0b50-793575158e6f",
  "outputs": {},
  "resources": [
    {
      "mode": "managed",
      "type": "aws_s3_bucket",
      "name": "example",
      "provider": "provider[\"registry.terraform.io/hashicorp/aws\"]",
      "instances": [
        {
          "schema_version": 0,
          "attributes": {
            "acceleration_status": "",
            "acl": null,
            "arn": "arn:aws:s3:::terraform-use-case-bucket",
            "bucket": "terraform-use-case-bucket",
            "bucket_domain_name": "terraform-use-case-bucket.s3.amazonaws.com",
            "bucket_prefix": "",
            "bucket_regional_domain_name": "terraform-use-case-bucket.s3.us-east-1.amazonaws.com",
            "cors_rule": [],
            "force_destroy": false,
...
It's very important to never delete or manually edit this file as you could permanently corrupt your state! Best practice is to configure Terraform to use a remote backend to store state in a secure and versioned location outside your local development environment, but we'll get to this in a future article.
One final note on state, because the state file contains all information on deployed resources, sensitive data may be included in the state. Always treat the state itself as sensitive data and never commit it to source control like GitHub!
Step 7: Destroy Terraform Project
Just as easy as we created our Terraform project we can destroy it.
terraform destroy
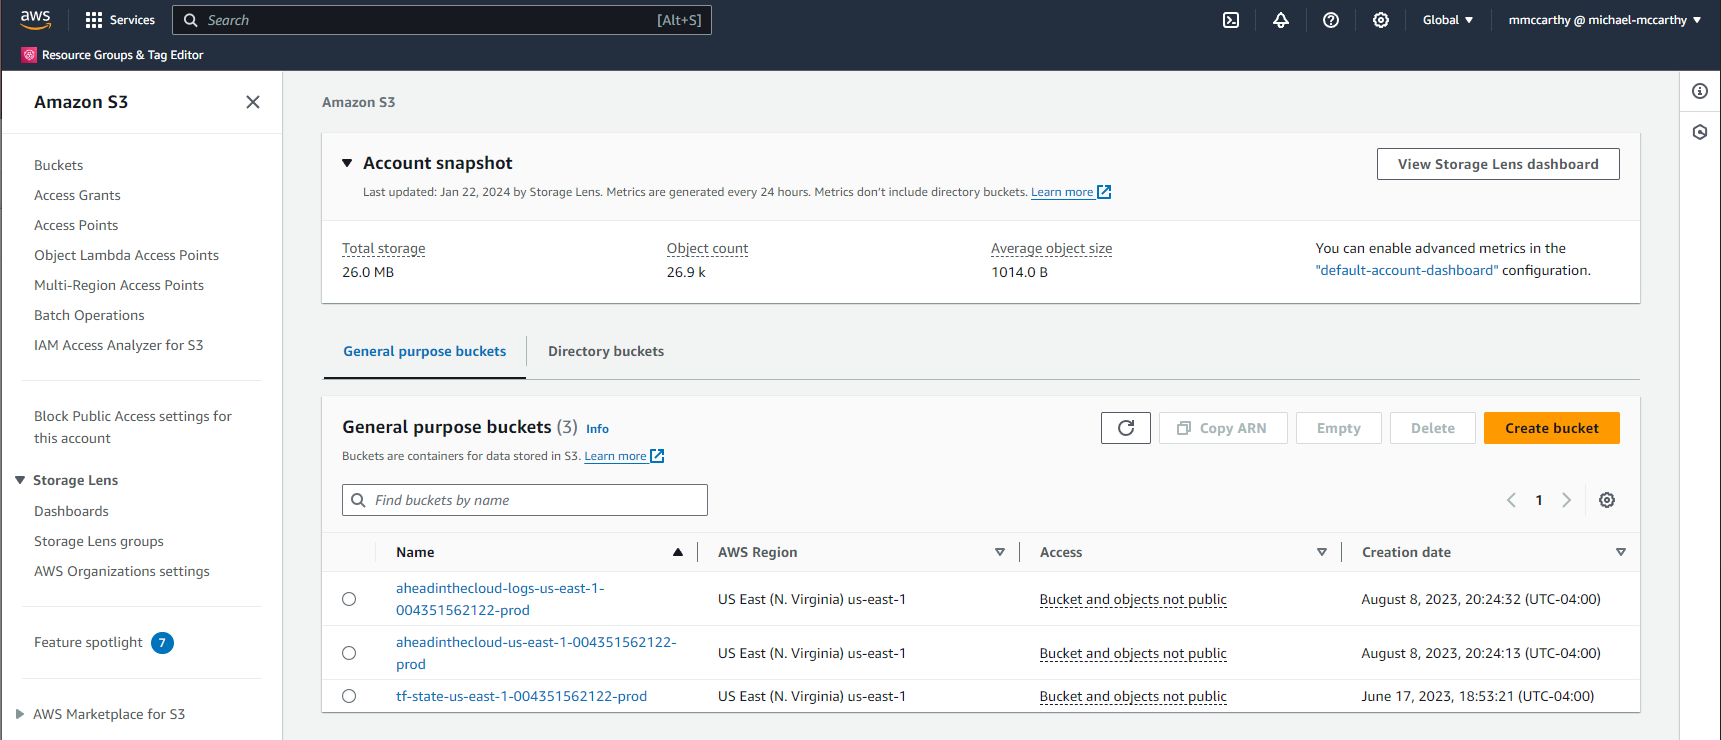
And it's gone!
Conclusion
If you've come this far congratulations on your first Terraform deployment to AWS! In this article we successfully created an IAM User, IAM Group, and IAM Policy. Created IAM Access Keys for authentication from our local development environment. Installed and configured AWS CLI with access keys. And installed Terraform. We then created a simple Terraform project with a main.tf declaring a single S3 Bucket, initialized our project with terraform init and deployed it with terraform apply. Finally we cleaned up our deployment by running terraform destroy.
This was just a very small sample of what Terraform can do, but you can build a lot on this foundation. It wouldn't be hard for me to change the name of my existing bucket in place. Or even deploy an EC2. All I would have to do is add, update, or delete my resource blocks in main.tf and run terraform apply again! I'll leave future experimentation as an experiment for the reader.
If you're interested in next steps, I would highly suggest you move forward into my next article, Setup a Terraform S3 Remote State in AWS!